
How to Make Matcha Cake: An Easy Recipe for a Soft, Moist Green Tea Sponge
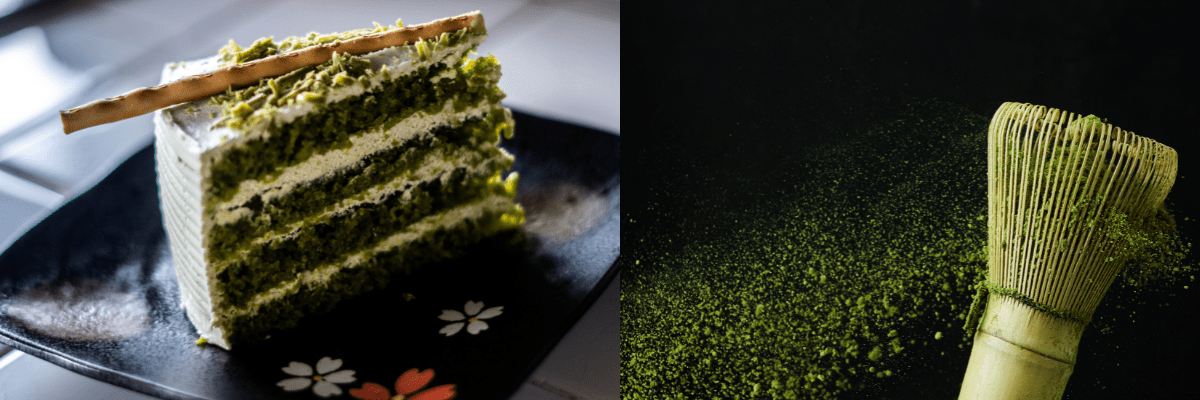
There's a quiet magic to a slice of matcha cake. That pale green crumb, the gentle aroma of green tea, the way it pairs so perfectly with a steaming cup of coffee or a cold glass of milk. If you've ever wondered how to make matcha cake at home without it turning out dry, bitter, or oddly grey, you're in exactly the right place.
This easy matcha cake recipe gives you a soft, moist, and beautifully green sponge with balanced flavor (not too earthy, not too sweet) and a tender crumb that holds up well whether you frost it, dust it with powdered sugar, or just eat a slice straight off the cooling rack while no one's watching.
Let's get into it.

What Makes This Matcha Cake Recipe Work
A lot of homemade matcha cakes fall short for a few common reasons: low quality matcha, overmixing, or skipping the sifting step. This recipe addresses all of that. Here's what you can expect:
- A genuinely soft texture. The combination of butter and a splash of neutral oil keeps the crumb tender for days, not just the first day.
- Honest matcha flavor. No food coloring, no extracts, no shortcuts. Just real green tea powder doing its thing.
- Simple, accessible ingredients. Nothing exotic. If you've baked a vanilla cake before, you already know the rhythm.
- Flexible to your taste. Single layer, two layer, cupcakes, or sheet cake. The batter works for all of it.
Choosing the Right Matcha (This Part Really Matters)
Your cake is only going to taste as good as the matcha you put into it. There are two main grades to know:
Ceremonial grade is the premium choice. It's made from the youngest, most tender tea leaves and has a smooth, almost sweet flavor with very little bitterness. It's also more expensive. Use this if you want a refined, delicate green tea note.
Culinary grade is specifically designed for baking, blending, and cooking. It has a stronger, more assertive flavor that holds up beautifully when mixed with sugar, butter, and flour. For this cake, culinary grade is my honest recommendation. It's affordable, flavorful, and made for exactly this kind of use.
One thing to watch out for: color. Quality matcha is a vibrant, almost neon green. If the powder looks dull, yellowish, or brownish, it's likely old or low grade, and it will give your cake a sad, muddy color and a bitter aftertaste. Buy from a brand you trust, and keep the tin sealed and away from sunlight.
Ingredients
For the Matcha Cake
- 1 ¾ cups (220g) all-purpose flour
- 2 tablespoons culinary grade matcha powder
- 1 ½ teaspoons baking powder
- ½ teaspoon baking soda
- ½ teaspoon salt
- ½ cup (115g) unsalted butter, softened to room temperature
- ¼ cup (60ml) neutral oil (canola, sunflower, or vegetable)
- 1 cup (200g) granulated sugar
- 3 large eggs, at room temperature
- 1 teaspoon pure vanilla extract
- ¾ cup (180ml) buttermilk, at room temperature
For the Cream Cheese Frosting (Totally Optional)
- 8 oz (225g) cream cheese, softened
- ½ cup (115g) unsalted butter, softened
- 3 cups (360g) powdered sugar, sifted
- 1 teaspoon pure vanilla extract
- 1 teaspoon matcha powder (for color and a hint of flavor)
- A pinch of salt
How to Make Matcha Cake, Step by Step
Step 1: Get Your Oven and Pans Ready
Preheat your oven to 350°F (175°C). Grease two 8-inch round cake pans, then line the bottoms with parchment paper rounds. If you're going single layer, a 9-inch pan works perfectly. For cupcakes, line a muffin tin with paper liners.
Step 2: Sift Your Dry Ingredients (Don't Skip This)
In a medium bowl, sift together the flour, matcha powder, baking powder, baking soda, and salt. Sifting is non-negotiable when you're working with matcha. The powder is extremely fine and clumps easily, and you absolutely don't want surprise pockets of concentrated tea showing up in your finished slices.
Step 3: Cream the Butter, Oil, and Sugar
In a large mixing bowl (or in a stand mixer with the paddle attachment), beat the softened butter, oil, and sugar together on medium-high speed for 3 to 4 full minutes. You want the mixture pale, fluffy, and noticeably lighter in color. This step traps air, which gives your cake its rise and tender structure.
Step 4: Beat In the Eggs and Vanilla
Add the eggs one at a time, mixing thoroughly after each one. Scrape down the bowl between additions to make sure nothing's hiding at the bottom. Stir in the vanilla.
Step 5: Combine Wet and Dry, Carefully
With the mixer on low, add the dry ingredients in three parts, alternating with the buttermilk in two parts. Start with dry, finish with dry. Mix only until everything is just combined. Overmixing develops gluten, which turns your tender cake into a rubbery one.
Step 6: Bake
Divide the batter evenly between your prepared pans and smooth the tops with a spatula. Bake for 25 to 30 minutes, or until a toothpick inserted in the center comes out with just a few moist crumbs. The top should spring back gently when you press it.
Step 7: Cool Completely
Let the cakes rest in their pans for 10 minutes before turning them out onto a wire rack. Allow them to cool all the way down before you even think about frosting. Trust me on this one. Frosting a warm cake is how cream cheese ends up sliding off the sides and onto your counter.
Step 8: Whip Up the Frosting
While the cakes cool, beat the cream cheese and butter together until smooth and creamy, about 2 minutes. Add the sifted powdered sugar one cup at a time, mixing on low (unless you enjoy wearing it). Beat in the vanilla, matcha powder, and salt, then whip on medium-high for another minute until light and spreadable.
Step 9: Assemble and Decorate
Place one cake layer on your serving plate. Spread a generous swoop of frosting on top, then add the second layer. Frost the top and sides, or go for a rustic naked cake look by leaving the sides bare. Finish with a light dusting of matcha powder for that bakery-style touch.
Tips for the Softest, Most Flavorful Matcha Cake
Even a simple recipe benefits from a few small tricks:
- Use room temperature ingredients. Cold eggs and buttermilk seize up the butter, leaving you with a lumpy, uneven batter. Pull them out an hour before you bake.
- Don't overbake. Matcha cake dries out faster than vanilla. Start checking at the 25 minute mark.
- Weigh your ingredients if you can. A kitchen scale gives you far more consistent results than measuring cups, especially with flour.
- Taste your matcha first. Mix a tiny pinch into hot water. If it tastes harsh or fishy on its own, that flavor will only get stronger once it's in your cake.
- Store matcha properly. Light, heat, and air are matcha's worst enemies. Keep yours in an airtight container in a cool, dark cupboard.
Easy Variations to Try
Once you've nailed the base recipe, these tweaks open up new possibilities:
Matcha and white chocolate cake. Fold half a cup of white chocolate chips into the batter for sweet, creamy pockets that balance matcha's earthy notes beautifully.
Matcha strawberry layer cake. Slice fresh strawberries between the layers along with the frosting. The pairing is iconic for good reason.
Matcha cupcakes. Divide the batter into a lined muffin tin and bake for 18 to 20 minutes. Makes about 18 cupcakes, perfect for parties.
Matcha sheet cake. Pour everything into a 9x13 inch pan and bake for 30 to 35 minutes. Easier to slice, easier to share.
Matcha pound cake. Skip the buttermilk, swap in sour cream, and bake in a loaf pan for a denser, richer version that travels beautifully.
How to Store Matcha Cake
Frosted matcha cake stays fresh in an airtight container in the fridge for up to 4 days. Pull it out about 30 minutes before serving so the crumb softens and the flavors come back to life.
Unfrosted cake layers freeze beautifully. Wrap each layer tightly in plastic wrap, then again in foil, and store in the freezer for up to 2 months. Thaw at room temperature before frosting.
Final Thoughts on This Matcha Cake Recipe
If you've been hesitant to bake with matcha, this is the recipe to start with. It's forgiving, it's beautiful, and it tastes the way matcha cake is supposed to taste: soft, slightly sweet, and unmistakably green tea forward without being bitter.
Bake it once, and I'm pretty sure it'll work its way into your regular rotation. Whether you're serving it at a tea party, gifting a loaf to a friend, or just baking it because you bought too much matcha (we've all been there), this cake delivers every single time.
If you give it a try, I'd love to hear how it turned out. Happy baking, and may your matcha always be that beautiful, vibrant green.


Leave a comment
This site is protected by hCaptcha and the hCaptcha Privacy Policy and Terms of Service apply.